Friday, July 28, 2006

The Auspicious Month of Shravan

Edible Lamps?


According to the Marathi calender the auspicious month of Shravan commenced this Wednesday. Shravan is that month in which it rains in abundance in most of India and after a hot summer the rains are welcomed by the farmers as they promise a good crop.

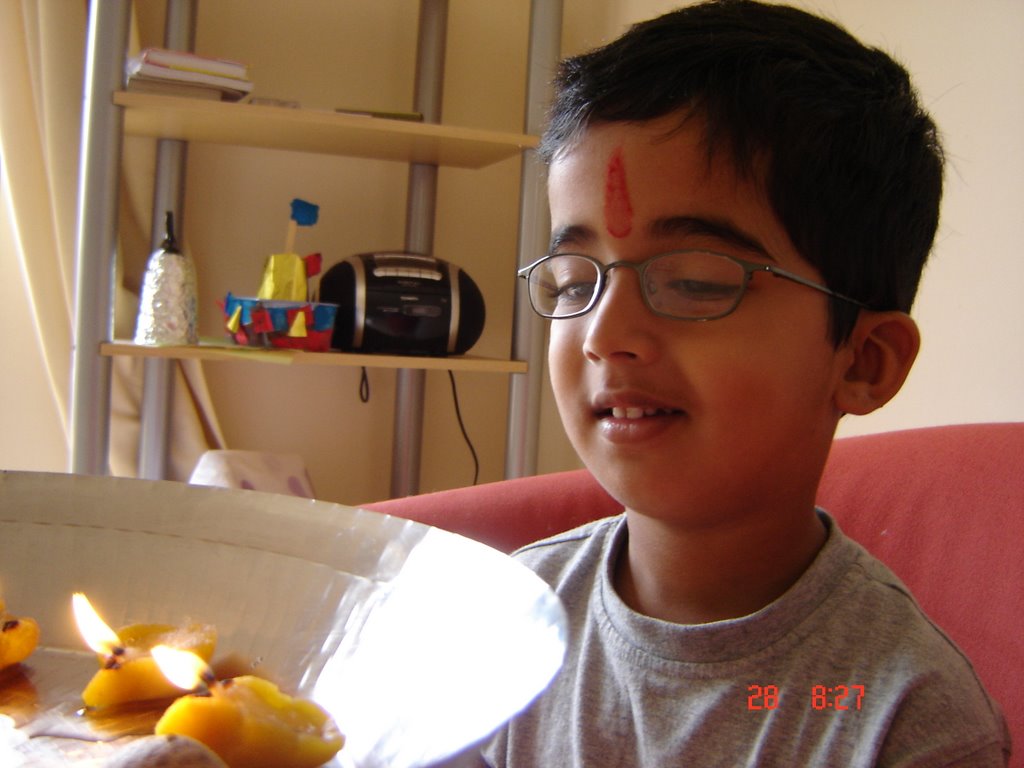
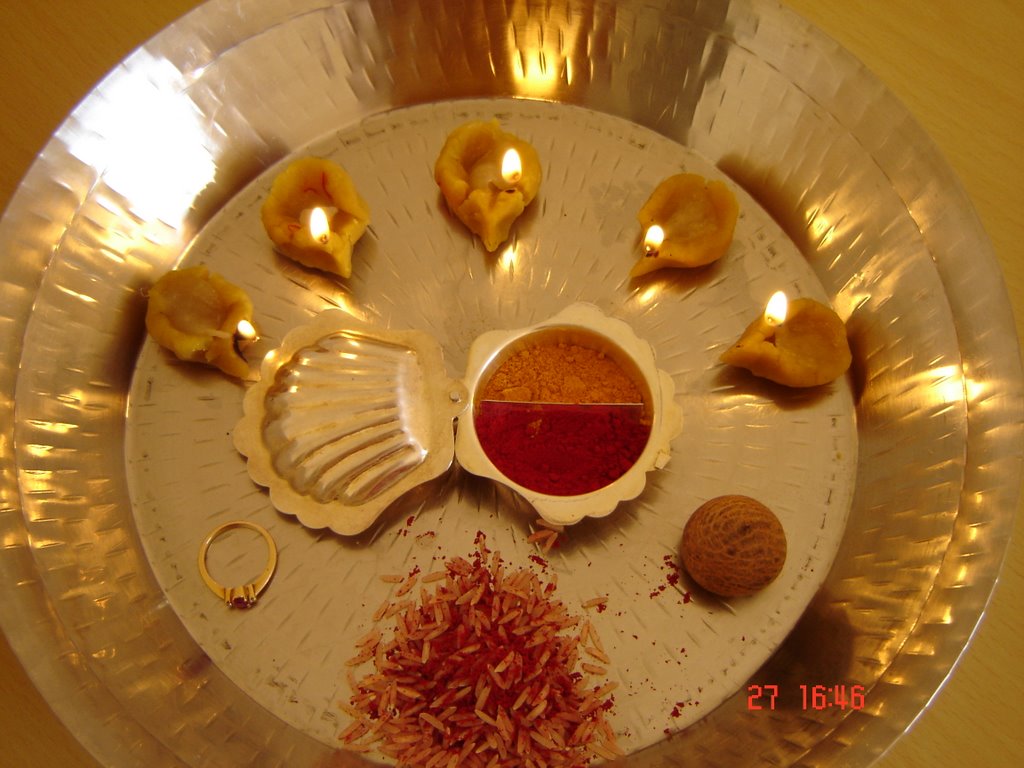
AlthoughI am not one to follow all the small customs and traditions dictated by the Marathi calender I do like some, particularly those which my mother used to follow mainly because they bring back good childhood memories. So here is one tradition I follow with my son on any one Friday in the month of Shravan. See the pic above and guess what I have made the lamps from. I am sure most of you might have guessed correctly, but for those who don't know I won't keep the suspense too long. They are made from Puran.


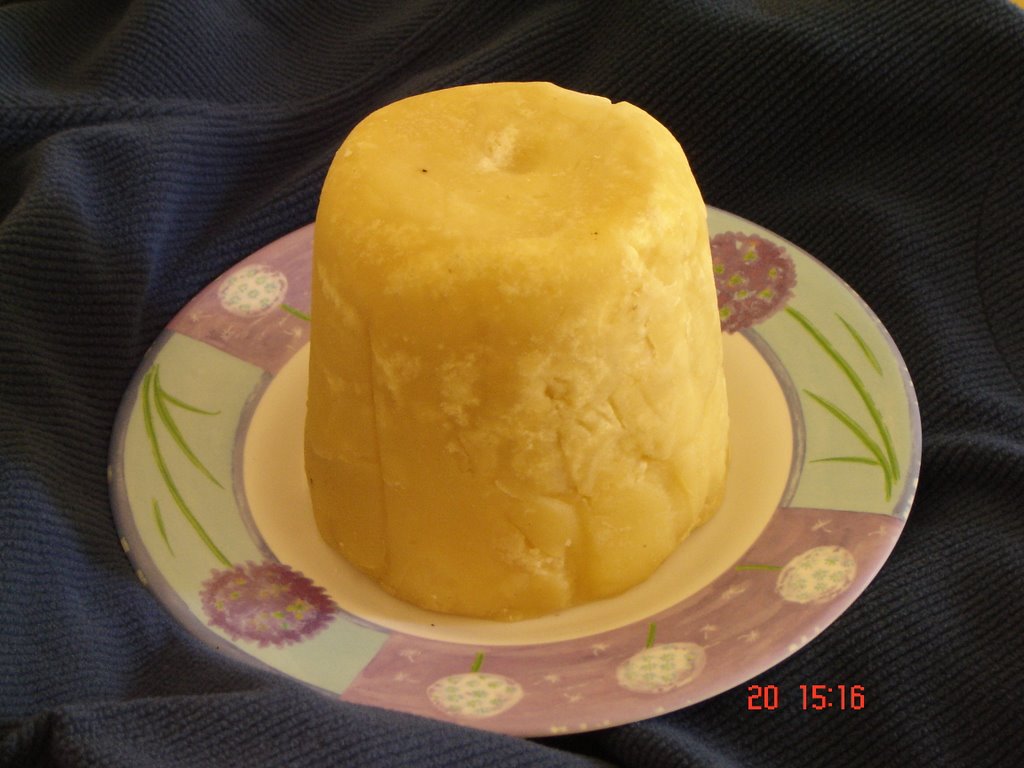
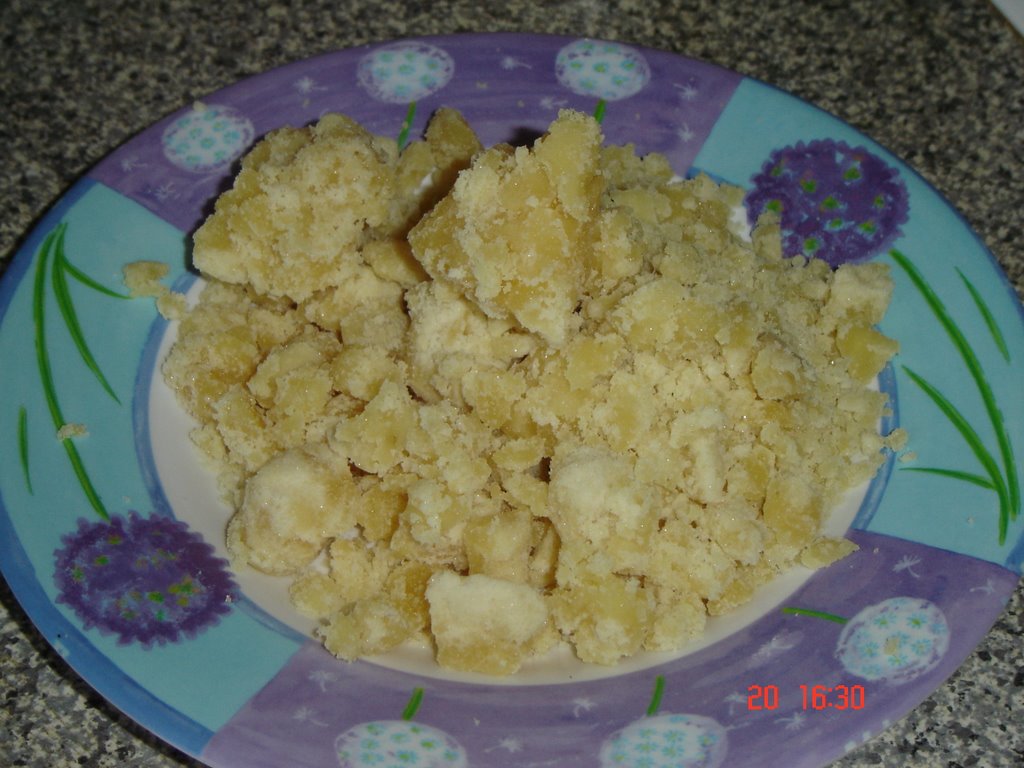
You will find most marathi households cooking puran on Shravani Shukrawar (Friday in the month of Shravan). It is a speaciality and made on most auspicious occasions like poojas, weddings and festivals etc. In fact in some households it is considered so auspicious to cook puran that it has to be cooked in a small quantity on each festival even though the main sweetdish that day might be something else. Puran is mainly made for Puran poli,the recipe of which you will find on Vaishali's Happy Burp, but it can be eaten just as it is with ordinary chappatis too. Thats what my son loves. Of course he does manage to even gobble quite a lot of it just like that.
So on any one friday in Shravan I make these small puran lamps and prepare a pooja thali. The tradition is to apply the red kumkum on the forehead of all the children in the house ,show them the lit lamps by holding the thali in front of them and move the thali in circular motion in front of the child's face. This sounds a bit odd to explain in English but I don't know how else to do . Well for the child the fun part is when he gets to eat the lamps after the ritual. I know I used to enjoy it. And that below is my 4 year old looking forward to eating his lamps.

Thursday, July 27, 2006

Tip Of The Week No2


Not Ice-Cubes but Spice Cubes


Hi , here I am back with my Thursday tip No 2.The small cubes and the large triangular blocks that you see in the pic above are what I call my spice cubes. The small ones are ginger cubes and the large blocks are frozen blocks of fresh tomato puree. I make these every 2 weeks and use them in all my curries and gravies. They really speed things up when actually cooking. You can make similar cubes with garlic paste and grated fresh coconut. Add a little salt to the ginger and garlis pastes before freezing and they keep for months in the freezer. I use small ice trays which I got in Ikea. So each ginger or garlic cube is equivalent to 1 tspn of paste and each tomato puree block is made from 1 large tomato.

Monday, July 24, 2006

Almond and Cinnamon Munchies JFI no 4 Flour


These biscuits are ideal for a tea party and are particularly popular with children if you cut them into animal shapes. I have a group of 4/5 friends and we meet up atleast once a week at tea time at someone's place. Obviously the children are there too and they need to be given different treats to keep them quiet for some time so they let us ladies chat. So here are the munchies I made for them.

Ingredients needed:

200 gm self raising flour
1/2 tspn soda-bi-carb
1 tspn cinnamon powder
2 tspn muscovado sugar (or any other brown sugar will do but muscovado is delicious)
1 tblspn chopped almonds
50 gms butter
50 gms golden syrup
raisins or chocolate chips for decorating
cookie cutters of various shapes (in case you do not have cutters you can simply use the round plastic lid of any bottle or container that you might have lying in your cupboard)


1. Sift the flour, soda-bi-carb and cinnamon together
2. Stir in the sugar and the ground almonds
3. Melt the butter and the golden syrup in a heavy bottom pan on a gentle heat
4. Remove pan from the heat and gently stir in the flour to form a soft but not sticky dough
5. Knead gently just to bring the dough together
6. Roll out the dough to 4mm thickness and cut into various shapes with your cutters. Decorate the animal shapes with chocolate or raisin eyes and noses.

7. Bake for 12-15 mins at 190deg C. Let the biscuits cool before storing in an airtight container.
Serve with coffee ,tea or simply with a glass of milk

Thursday, July 20, 2006

Tip Of The Week

Hey all Blog-o-Buddies . Starting today I'll be posting a useful tip every week on Thursday. You might know some of them already or you might never have heard some. The tips will be mostly pertaining to cooking and the kitchen, but I might squeeze in a couple of tips which might help you in your work in the rest of the house too. Anything that will appeal to the Domestic Goddess in you and make your Godly Tasks easy.

Okay here goes:
Do you buy jaggery (unrefined palm sugar) in the form of a block and find it tiresome to break it down into smaller pieces. Well just pop the entire block into your microwave and set the microwave on the medium setting for 20 secs (when doing it for the first time keep a close watch on the block because every microwave will operate differently) When you remeve the block it will still look like it did before you put it in. But if you gently press it down with your palm it will easily crumble into a heap. If it doesn't crumble easily just pop it back into the microwave for another 10 to 12 secs. Just take care that the jaggery doesn't start to melt. Try it ! It always works

Tuesday, July 18, 2006

Homemade Caramel Custard

After that sizzling hot chilli pickle here is a really coolcoolcool custard that will not get you all hot and flustered while making it. Its the easiest thing to make in the world and will ensure that you never have ready-made caramel custard again.

Ingredients:

3 cups full fat milk

4 eggs

15 tspns sugar (12 for the custard and 3 for the caramel)

1 tspn vanilla essence

Procedure:

Add 12 tspns of sugar to the milk and bring to a boil. Switch off the gas and let the sweet milk cool. While the milk cools beat the eggs (with a hand blender preferably or with a simple whisk) and set aside. Now lets prepare the caramel in a tin . For this you will need a steel tin or any other steel vessel which will fit in your pressure cooker. Place 3 tspns of sugar in the tin and a tblspn of water. Now place the vessel on low heat and let the sugar caramelise. If you are doing this the first time it might seem a bit intimidating but just be patient and do not increase the heat at any cost else the caramel will burn. The sugar and water will slowly turn golden. Tilt the tin in all directions so that the caramel spreads all over the bottom of the tin like in the pic below. Let this cool. After it cools it will feel hard to touch.

After the milk has cooled, add the beaten eggs and the vanilla essence and pour this mixture into your caramel tin. Cover it with a metal plate and pressure cook the entire mixture. The duration of cooking defers from cooker to cooker but do it the way you would if you were cooking dal and rice together. Do not open the cooker immediately. When the cooker is warm to touch open it and let your custard cool down a bit before popping it into the fridge. Chill thoroughly.

Now comes the best part. When you are ready to eat it . Place a serving dish upside-down on the custard tin and holding the tin and plate together in your hand(say a prayer) invert the tin so that the custard falls onto the serving dish. Slice into generous wedges, decorate with cream or eat it as it is. Eaten in anyway it is delicious. Enjoy!!!!! Meanwhile I'll pop over to Meeta's Whats for Lunch Honey and put in this entry for her Monthly Mingle "Beat the Heat"


Monday, July 17, 2006

Kharachi Mirchi (Pickled Green Chillies)
Oh god!!!! As usual I am late in sending my entry. Basically as a newcomer to blogging I never know what event is being hosted where. Anyway better late than never. So here's my entry for Barbara's The Spice is Right .


This is a typical Maharastrian (a state in Western India) pickle which has a very important place in all Marathi households. Eaten along with a meal or with a with a snack (in very small quantities) its adds that extra zing to anything. So here goes!!!

Ingredients

1 dozen hot green chillies cut into very small pieces

Juice of 2 lemons (med size)

1 tspn fenugreek seeds powdered

1 tspn asafoetida (Hing)

2 tspn salt

1/2 tspn sugar

1/2 tspn powdered mustard seeds

1 tspn turmeric powder

3 tblspns cooking oil

Procedure:

Heat the oil in a pan. Add to that half the quantity of asafoetida, and all the powdered fenugreek. Let this mixture cool down. After it has cooled, add to it the remaining asafoetida,the turmeric powder, sugar and mustard powder and give it a good stir.Add now the main ingredient i.e the chillies and mix well.

There is a unique way of storing this pickle. In a clean bottle first put in a tspn of salt, then the chilli mixture and then all the lemon juice. Finally top it all with another spoon full of salt .The salt is the natural preservative. Close the bottle tightly. Leave this pickle for about a week in this condition and then open the bottle. Stir the pickle thoroughly before using. This way it won't spoil. As an added precaution store the bottle in the fridge.


Friday, July 14, 2006

MIX VEGETABLE PARATHAS (PURNA PARATHAS)


I got the idea of making these parathas from a marathi T.V serial I used to watch regularly back home in Pune. The scene was such that a newly wed girl tries her hand at cooking and makes mixed veg parathas (she calls them Purna Parathas : Purna meaning Complete in marathi) for everybody in her new home and how at first they turn up there noses at eating something so alien to them but after the first bite they are all gaga about it and cannot stop singing their praises. Well I hope you people will also go gaga over my recipe. It is completely my creation and it is a very wholesome dish that can be eaten as breakfast, lunch or supper. well here goes:

Ingredients needed:

For the outer cover of the parathas:

3 cups wholewheat flour, 2 tspns salt, 1 tspn fennel seeds powdered(optional), 1 tspn turmeric powder, 1 tspn chilli powder 2-3 tblspns oil.

For the stuffing:

2 large potatoes boiled and mashed, 1 carrot grated, 1 onion grated, 2-3 cloves garlic crushed, 1/4 cup boiled and mashed green peas, 1/2 beetroot grated a handful of spinach leaves finely chopped, 1 tblspn kasoori methi, 1/4 cup grated cabbage, 2-3 tblspns tomato ketchup, 1.5 tspn chilli powder, salt as per taste oil for cooking.

Procedure for the outer covering:

Mix all the ingredients and form a dough which is not too soft and not too stiff. Cover it and set aside.

Procedure for the stuffing:

Heat the oil and first add the grated garlic and onions. Saute till they turn golden brown. Next add the grated carrots, mashed peas, grated beetroot, chopped spinach, kasoori methi, and cabbage and fry for a few minutes. Now add to this the ketchup chilli powder, salt and mix well. Finally stir in the mashed potatoes and give it a good mix. Taste the stuffing. Its okay if it tastes slightly too salty and too hot because the outer covering will mellow it down. Let the stuffing cool completely before rolling out the parathas.

Take a portion of the dough and roll it into a ball (a little smaller than a golf ball). Roll it out about 3 inches in Diameter onto a well dusted platform. Now take a tblspn full of the stuffing and set it onto the rolled dough. Envelope the stuffing completely in the dough . Dip this stuffed dough ball again into some flour and now roll out a thick paratha. Roast the paratha on a hot tawa(griddle) and smear with butter on both sides. you can dry first dry roast all the paratha and roast them again with butter just before serving them

Serve hot with a dal fry, fresh yogurt and pickles of your choice or simply with tomato ketchup.

You might feel exhausted just reading the recipe but believe me these parathas are worth all the effort you put in. At my place they are a favourite weekend brunch.


Wednesday, July 12, 2006

The Humble Coriander

THE HUMBLE CORIANDER

This is definitely one herb that all Indians take for granted. It is available in such abundance in India that you realise its value only when you travel out of India and have to stay in a place where you can buy it only seasonally and that too at a very high price. It has so often happened in India that I have a bunch of coriander lying in the fridge for several days and I do nothing about it and finally it rots and has to be thrown away. Which too I have done without blinking an eyelid. But it is only now that I have started really treasuring it.

So here is one delicious maharashtrian snack with Coriander as the Hero of the Recipe

Kothimbir (Coriander)Wadi

Ingredients:

4 cups chopped coriander
2 cups besan (chickpea flour)
1 tblspn wholewheat flour
1.5 tspn chilli powder
1 tspn salt
1/2 tspn turmeric powder
1 tspn sesame seeds
1 tspn powdered fennel seeds (saunf)
1/2 tspn powdered sugar
2 tblspn oil

Procedure

Mix all the above ingredients and form a dough by adding very little water at a time (do not add too much water or the whole thing will turn soggy and you will start hating me).

If you find the mixture too sticky just oil your palms well and then handle the dough. You can divide the dough into 2 or 3 portions. Shape them into elongated logs. Now oil a steel vessel (one which you can place inside your pressure cooker) and put all the portions of the dough in it.


Pressure cook this mixture for the same duration as you would for dal and rice. (Don't forget to switch on the gas under the cooker or then you will wonder why its taking so long ha ha ha!) .Let the cooker cool down a bit and then open it. Also let the steamed dough cool. After it has cooled completely cut it into slices as thick or thin as you want.

Heat some oil on a tawa(griddle) and shallow fry these pieces (Wadis). Serve hot garnished with fresh coriander and freshly grated coconut.

If you are trying to lose weight eat these wadis without shallow frying them and only steamed. They can be eaten as a snack with tea or as part of an entire meal.


Monday, July 10, 2006

Good Health in Children

12 Easy Ways To Increase Fruit And Vegetable Intake In Children


1. Liquidise Vegetables to make Soups or Pasta Sauce

2. Puree fruits and add to Yogurt, Porridge, Custard or Puddings


3. Make fresh fruit smoothies for Breakfast and Snacks

4. Make freshly squeezed Fruit and Vegetable Juices

5. Chop raw vegetables like Cucumbers, Carrots and Beetroots and serve with Dips.

6. Make your own pizza and top it with vegetables like Spinach, Sweetcorn, Peppers and Tomatoes

7. Mash together a few root vegetables like Sweet potatoes, Parsnips and Carrots and serve this instead of only potatoes

8. Make delicious burgers and veg cutlets at home and serve with a dollop of tomato Ketchup.

9. Puree fresh fruits and freeze them to make very healthy ice lollies.

10. Add extra vegetables to your children's favourite foods like noodles, pasta etc

11. Top Breakfast cereals , Icecreams and Yogurts with slices of fresh fruit.

12. Introduce Dry Fruits to children at a very young age perhaps as soon as they learn to chew and they will be hooked on to them for life.

Wednesday, July 05, 2006

Aaloo Methi Fry


Aaloo Methi
Originally uploaded by Anupama Puranik.
A Family Favorite

Ingredients:

8 Baby Potatoes
1 cup green peas boiled
2 tblspns Kasoori Methi
1 large tomato pureed
1 onion chopped
2 tspn cumin seeds (jeera)
2tspn Dhana jeera powder (cumin and coriander powders)
1/2 tspn garam masala
3-4 tblspns oil

Procedure:
Peel the potatoes, prick them with a fork and boil them in salted water until cooked but firm. drain the water and keep the potatoes aside.

Heat the oil in a pan (Kadhai), add the jeera and fry for few seconds. Then add the chopped onion. Fry the onion till golden brown. Next add the kasoori methi and fry again for a few minutes. Now add the tomato puree and fry till the oil separates. Add to this the garam masala, the dhana-jeera powder and chiili powder.Mix the masala and the powders well and again fry for one minute.

Lastly add the boiled potatoes and the peas to the mixture and stir them in gently. As the potatoes are bolied in salted water check the taste before adding more salt.

Garnish with chopped coriander and small cherry tomatoes for that special touch.

Tuesday, July 04, 2006

Delicious and Healthy too.

Grilled Spring Rolls

This is one of my favorite Chinese dishes. But I always felt guilty after eating it because of its deep fried nature. So when I got this idea of grilling the rolls instead of frying them I had to try it out . And it came out really well. Check it out.

Ingredients needed:

For the Stuffing:
1 cup boiled noodles
2 cups mixed vegetables (beans, green peas, carrots,sweet corn,spring onions etc)
1/2 cup shredded cabbage
2 tablespoons tomato ketchup
1 tbl spn soya sauce
1/2tsp chilli powder
salt to taste
2 tbl spns cooking oil
(Non Vegetarians can add 1/2 cup shredded chicken too)

For the outer Cover of the roll:
1 pack of whole wheat or plain tortilla wraps
1 egg yolk beaten or 2 tbl spns of milk

Procedure:
Saute all the vegetables except the shredded cabbage in a pan until just cooked (do not overcook). Add the sauces ,chilli powder, salt and adjust the seasoning according to your taste. Now add the cabbage to the stuffingand mix it well.

Take a tortilla wrap and cut it vertically into 1inch broad strips. Spread the stuffing evenly on the entire strip.( Do not spread too generously or the stuffing might fall out once you have rolled the wrap ) Now carefully roll the wrap and secure it with a toothpick. Carry on the same procedure with all the strips

Once all the rolls are ready brush them with beaten egg yolk (Vegetarians can brush them with milk or you can even brush them with melted butter).
Preheat the oven to 200 deg centigrade . Lay out all the rolls on a baking sheet and grill for 20 to 25 mins turning them over once. The rolls will be golden in colour and crispy when they are done.

Enjoy them with Schezuan Sauce and a crispy salad. They make a meal all by themselves and as they are grilled you can eat to your hearts content
.
I tried to post pictures of the rolls that I made but something went wrong and they just did not get published.